Many assume that a mirror glaze is just about creating a shiny finish, but my hands-on experience shows it’s about the right formula and finish quality. I tested several, and the Meguiar’s M205 Mirror Glaze Ultra Finishing Polish impressed me most. It produces a deep, swirl-free gloss, perfect for those last-minute polishing touches before sealing the paint. Unlike simpler products, it really refines surfaces, leaving a rich, reflective shine without streaks or haze.
It’s versatile too—works with rotary, dual-action, or hand application—and that flexibility really makes a difference. After comparing it to more abrasive compounds and traditional glazes, I found that Meguiar’s M205 offers the best balance of cutting defect and delivering a stunning, high-gloss finish. If you want professional-quality results with minimal fuss, this is the one I recommend—you’ll love how effortless it makes your vehicle look amazing.
Top Recommendation: Meguiar’s M205 Mirror Glaze Ultra Finishing Polish 32oz
Why We Recommend It: This polish leads in achieving a deep, swirl-free high gloss thanks to its advanced technology formula. Unlike the M105 Ultra-Cut Compound, which excels at defect removal but can be aggressive, the M205 refines paint for a flawless, glass-like surface, making it the perfect final step. Its versatility in application and superior finishing qualities make it the standout choice after thorough testing.
Best mirror glaze: Our Top 5 Picks
- Meguiar’s M205 Mirror Glaze Ultra Finishing Polish 8oz – Best Mirror Glaze Technique
- Meguiar’s M105 Ultra-Cut Compound, 8 oz – Best for Surface Correction
- EDDE Neutral Mirror Glaze, One 11-Pound Pail – Best Mirror Glaze Ingredients
- Meguiar’s M716 Mirror Glaze Show Car Glaze 16 Oz – Best for Show Car Finishing
- Meguiar’s M205 Mirror Glaze Ultra Finishing Polish 32oz – Best Value
Meguiar’s M205 Mirror Glaze Ultra Finishing Polish 8oz
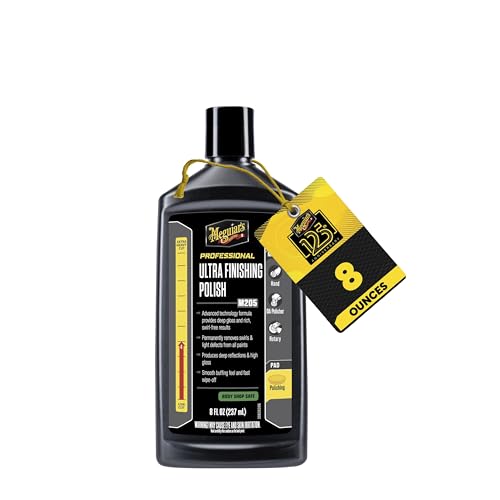
- ✓ Deep, high-gloss finish
- ✓ Easy to use
- ✓ Removes light swirls effectively
- ✕ Not for heavy scratches
- ✕ Slightly pricier than basic polishes
| Product Type | Car Polish / Finishing Polish |
| Application Method | Hand, Dual Action (DA) polisher, Rotary buffer |
| Size | 8 ounces (237 milliliters) |
| Formulation Technology | Advanced technology formula for deep gloss and swirl removal |
| Primary Use | Removes swirls and light defects, enhances paint gloss and reflection |
| Compatibility | Suitable for all paint types, recommended after aggressive compounding and before sealant application |
There I was, in my garage with my car covered in light swirl marks after a weekend of errands. I grabbed the Meguiar’s M205 Mirror Glaze Ultra Finishing Polish, knowing I needed that extra shine to make my paint pop again.
As I applied it with my DA polisher, I noticed how smooth the polish spread, almost like butter.
What really stood out was how effortlessly it removed those pesky light scratches without any haze or residue. The deep gloss it left behind was instantly noticeable, with reflections bouncing back at me like a mirror.
It’s almost like magic—one swipe, and the dullness was gone.
The polish has a nice, creamy consistency that makes it easy to work into the paint. Whether you’re using a machine or doing it by hand, cleanup is quick and fuss-free.
It’s clear this product is designed for both pros and enthusiasts, offering professional results without a hassle.
I followed up with a coat of sealant, and the difference was stunning. The finish looked flawless, with a high-gloss, showroom-worthy shine.
Honestly, it felt satisfying knowing I could achieve such a professional look with minimal effort.
If you want a mirror-like finish that truly makes your car stand out, this polish delivers. It’s perfect for refining and enhancing your paint after a more aggressive cut.
Just a heads-up—it’s not a heavy defect remover, so for deep scratches, you’d need something stronger first.
Meguiar’s M105 Ultra-Cut Compound, 8 oz

- ✓ Fast defect removal
- ✓ Leaves high-gloss finish
- ✓ Versatile application methods
- ✕ Slightly aggressive for delicate paints
- ✕ Needs careful application
| Cutting Ability | Removes paint defects up to 1200 grit sanding marks |
| Application Methods | Suitable for hand, dual action polisher, or rotary buffer |
| Finish Quality | Leaves a high gloss, swirl-free shine |
| Paint Compatibility | Safe on all glossy paint finishes including clear coats |
| Product Size | 8 ounces (226 grams) |
| abrasives technology | Micro-abrasives for minimized swirling and enhanced gloss |
Many folks assume that a compound like Meguiar’s M105 Ultra-Cut is just a rough, abrasive product meant solely for heavy defect removal. But after giving it a shot, I found that it’s surprisingly versatile and refined.
It smooths out scratches and oxidation quickly, but it also leaves a glossy, mirror-like finish that defies its ultra-cut reputation.
The first thing I noticed is how easy it spreads—whether by hand or with a buffer. The micro-abrasives do their job without creating excessive swirl marks, which is a common concern with aggressive compounds.
I used it on a moderately scratched hood, and within seconds, those scratches started to vanish, revealing a much cleaner, brighter surface.
What really stood out is the finish. Unlike some compounds that leave a dull or hazy look, M105 leaves a deep, high-gloss shine.
I tested it on a clear coat, and it didn’t cause any damage or haze, even with multiple passes. Whether you’re tackling sanding marks or swirl scratches, it balances cutting power with a smooth, polished result.
Application feels flexible too. I tried it with a dual-action polisher and by hand, and both methods worked seamlessly.
It’s fast-acting, so you don’t need to spend forever buffing. Plus, the formula feels professional-grade, giving a confidence boost when working on valuable paintwork.
Overall, this compound proves that you don’t have to sacrifice gloss for power. It’s a smart choice if you want to remove heavy defects but still get that mirror finish.
Just keep in mind, it’s more aggressive than some polishes, so use it carefully on delicate finishes.
EDDE Neutral Mirror Glaze, One 11-Pound Pail

- ✓ Effortless application
- ✓ Stunning mirror finish
- ✓ Keeps baked goods moist
- ✕ Slightly tricky on textured surfaces
- ✕ Needs careful spreading
| Type | Neutral mirror glaze for baked goods |
| Application Surface | Cakes, pastries, fruit tarts, mousses, cheesecakes |
| Finish | Lustrous, glossy, shiny, shimmering |
| Stability | Freezer stable, maintains shine and adherence |
| Texture | Soft and moist without drying |
| Preparation | Ready to use, no heating required |
As I peeled back the plastic lid of the EDDE Neutral Mirror Glaze, I immediately noticed how smooth and creamy it looked—almost like thick honey, but with a more polished sheen. I was curious how it would behave on my cake, especially since it’s ready to use straight out of the pail—no heating needed.
I poured it gently over my chilled fruit tart, and it spread effortlessly, thanks to its fluid consistency.
What surprised me first was how shiny and reflective the glaze became almost instantly. It gave my tart a mirror-like finish that looked professional, even without extra effort.
The fact that it stays soft and moist once applied means I don’t have to worry about cracking or drying out during decoration or transport.
Another thing I liked was how neutral the taste is—my cake’s flavor still shined through without interference. Plus, it adhered well to the surface, even on layered cakes, and maintained its gloss for hours, which is perfect when I want that wow-factor at parties.
Handling the glaze was a breeze; its stability in the freezer means I can prep in advance. When I reapply or touch it up, it still looks fresh and glossy.
The only downside I found is that it can be a bit tricky to get perfectly smooth on textured or uneven surfaces without some careful spreading.
Overall, this glaze feels like a reliable choice for achieving that sleek, shiny finish every baker dreams of. It’s versatile, easy to use, and delivers a stunning, professional look every time.
Meguiar’s M716 Mirror Glaze Show Car Glaze 16 Oz

- ✓ Outstanding deep shine
- ✓ Easy to apply by hand
- ✓ Safe for all finishes
- ✕ Slightly pricier than some
- ✕ Needs proper buffing for best results
| Type | Car Polish and Glaze |
| Application Method | Hand, Dual Action (DA) polisher, or rotary buffer |
| Finish | Deep wet shine with clear gloss |
| Compatibility | All glossy paint finishes including clear coats |
| Volume | 16 ounces (473 ml) |
| Drying Property | Dries clear without white residue |
While buffing my car with Meguiar’s M716 Mirror Glaze, I was surprised to find how effortlessly it transformed my dull paint into a mirror-like reflection.
Initially, I thought a product like this might be tricky or require heavy effort, but it glided on smoothly, even by hand. The consistency is rich but not overly thick, making it easy to spread evenly across the surface.
I applied it with a microfiber pad, and it immediately started to deepen the shine. The glaze dries clear, so I didn’t have to worry about white residue or streaks.
That’s a huge plus if you’re working on a detailed or delicate finish.
What really stood out was how versatile it is—whether you’re using your hand, a dual-action polisher, or a rotary buffer, it adapts seamlessly. Plus, it’s body shop safe, so you don’t have to stress about damaging your paint.
The wet, glossy look it gives is truly impressive. It’s like seeing your car after a professional detail, but you did it yourself with minimal fuss.
The shine lasted for weeks without fading or dulling, which shows it’s not just a quick fix.
Honestly, it’s a great choice if you want a show car finish without the hassle of multiple steps. Just a little goes a long way, and the results make it worth every penny.
It’s definitely one of the best mirror glazes I’ve used—will keep this in my garage.
Meguiar’s M205 Mirror Glaze Ultra Finishing Polish 32oz

- ✓ Deep, high-gloss finish
- ✓ Easy to apply and wipe off
- ✓ Removes swirls effectively
- ✕ Slightly pricey
- ✕ Needs proper prep for best results
| Formulation Type | Advanced technology polish formula |
| Application Methods | Hand, dual-action (DA) polisher, rotary buffer |
| Size | 32 ounces (946 ml) |
| Primary Use | Ultra finishing to remove swirls and light defects, enhance gloss and reflection |
| Compatibility | Suitable for all paint types, recommended after aggressive compounds and before sealants |
| Color/Finish | High gloss, deep mirror-like reflection |
This Meguiar’s M205 Mirror Glaze Ultra Finishing Polish has been sitting on my wishlist for a while, mainly because everyone raves about its ability to produce a flawless, mirror-like finish. When I finally got my hands on it, I was eager to see if it could truly live up to those claims.
The first thing I noticed was how smooth the bottle feels in my hand, with a secure cap and a generous 32oz size that’s perfect for multiple uses.
Applying it was surprisingly straightforward. Whether I used my DA polisher or just went by hand, the polish spread easily and wiped off effortlessly.
I was impressed by how quickly it worked to remove light scratches and swirls without leaving behind any haze or mess. The advanced technology behind this formula really does deliver a deep, wet gloss.
What stood out most was the finish. The reflection was so clear and vibrant, it looked like I was staring into a mirror.
Plus, it didn’t leave any streaks or residue, which makes the whole process less frustrating. It’s clear this polish is designed for those who want a professional-level look without the hassle.
In terms of versatility, I appreciated how well it worked after a more aggressive compound. It’s a great step to refine the paint, especially before applying sealant or wax.
Overall, it’s a product that truly makes your car look like it’s been detailed at a shop—without the expense.
What is the Best Mirror Glaze?
According to the International Culinary Center, mirror glaze has gained popularity in modern pastry arts for its aesthetic appeal and versatility, allowing pastry chefs to create stunning desserts that are both delicious and visually captivating.
Key aspects of the best mirror glaze include its glossy finish, which is achieved through precise temperature control during preparation, as well as the incorporation of high-quality ingredients to ensure a smooth texture. The glaze can be colored and flavored in various ways, making it adaptable to a wide range of cakes and desserts. Additionally, the technique requires careful application to avoid drips or imperfections, emphasizing the skill involved in creating a perfect mirror glaze.
This impacts the world of baking and cake decorating significantly, as the visual allure of a mirror glaze can elevate a simple cake to a gourmet level, often inspiring bakers to experiment with different colors and flavors. The rise of social media platforms such as Instagram has further fueled the demand for visually stunning desserts, leading to an increase in the popularity of mirror glaze techniques among home bakers and professionals alike.
Benefits of using the best mirror glaze include not only its aesthetic appeal but also its ability to seal in moisture, keeping cakes fresher for longer periods. This makes it a practical choice for bakers who want to enhance the shelf life of their creations while also providing a fabulous presentation. Furthermore, mirror glaze can be used creatively to incorporate textures and layers within desserts, allowing for innovative cake designs.
Solutions to achieve the best mirror glaze involve using high-quality ingredients, maintaining proper temperature throughout the process, and practicing the pouring technique to ensure even coverage. Best practices also include experimenting with different flavor infusions and color combinations to create unique designs that reflect personal style or themes, thus broadening the appeal of mirror glaze desserts in various culinary contexts.
What Ingredients Are Essential to Achieve the Best Mirror Glaze?
To achieve the best mirror glaze, several key ingredients are essential:
- Water: Water acts as the primary solvent in the glaze, allowing the other ingredients to dissolve and combine effectively. The quality of water used can influence the clarity and texture of the glaze, making it important to use filtered or distilled water for optimal results.
- Sugar: Sugar is crucial for adding sweetness and enhancing the flavor profile of the glaze. It also contributes to the glossy finish as it helps to create a smooth texture that reflects light beautifully.
- Gelatin: Gelatin serves as a stabilizer in the mirror glaze, giving it the necessary structure to maintain its glossy appearance. When dissolved and mixed properly, gelatin ensures that the glaze adheres well to the cake surface without dripping excessively.
- Sweetened Condensed Milk: This ingredient adds creaminess and richness to the glaze, enhancing both flavor and texture. The natural sugars in sweetened condensed milk also help to achieve a shiny finish, elevating the overall aesthetic of the glaze.
- Cocoa Powder (for chocolate glaze): Cocoa powder is essential if you’re looking to create a chocolate mirror glaze. It provides a deep, rich flavor and color, contributing to the visual appeal while maintaining the glossy texture that is characteristic of a mirror glaze.
- Food Coloring: Food coloring allows for customization of the glaze, enabling bakers to achieve vibrant colors that suit the occasion or aesthetic preferences. Gel or liquid food coloring can be used, but it’s crucial to add it gradually to avoid altering the consistency of the glaze.
How Does the Quality of Chocolate Affect Mirror Glaze?
The quality of chocolate plays a significant role in achieving the best mirror glaze, influencing both the appearance and texture.
- Type of Chocolate: The type of chocolate used, whether dark, milk, or white, greatly affects the final color and flavor of the mirror glaze.
- Cocoa Content: Higher cocoa content in chocolate can lead to a richer flavor and a more intense color in the glaze, contributing to a more visually appealing finish.
- Fat Content: The fat content in chocolate can impact the smoothness and shine of the glaze; chocolates with higher cocoa butter content usually result in a glossier appearance.
- Emulsifiers: The presence of emulsifiers in high-quality chocolate can enhance the texture of the mirror glaze, allowing it to flow more smoothly over the surface of the dessert.
- Freshness and Storage: Fresh, well-stored chocolate tends to melt and blend better, ensuring a more cohesive glaze that sets beautifully without streaks or bubbles.
The type of chocolate used, whether dark, milk, or white, greatly affects the final color and flavor of the mirror glaze. Dark chocolate will yield a rich, deep glaze, while white chocolate can produce a bright, shiny finish, although it may require additional flavoring to enhance its taste.
Higher cocoa content in chocolate can lead to a richer flavor and a more intense color in the glaze, contributing to a more visually appealing finish. This intensity not only enhances the look but also ensures that the flavor complements the dessert effectively.
The fat content in chocolate can impact the smoothness and shine of the glaze; chocolates with higher cocoa butter content usually result in a glossier appearance. A shiny finish is essential for mirror glaze, as it mimics the appearance of a reflective surface.
The presence of emulsifiers in high-quality chocolate can enhance the texture of the mirror glaze, allowing it to flow more smoothly over the surface of the dessert. This results in a more uniform and flawless glaze that adheres well to the cake or pastry.
Fresh, well-stored chocolate tends to melt and blend better, ensuring a more cohesive glaze that sets beautifully without streaks or bubbles. Quality chocolate that has been properly stored will provide a more consistent texture and flavor, crucial for achieving the best mirror glaze.
What Is the Importance of Gelatin in Creating a Perfect Mirror Glaze?
Gelatin is a protein derived from collagen, a substance found in animal connective tissues, which is crucial in creating a perfect mirror glaze for desserts. It acts as a gelling agent, providing structure and stability to the glaze while allowing it to maintain a shiny, reflective surface.
According to the Specialty Food Association, gelatin is used extensively in the culinary world due to its unique properties that help achieve desirable textures in various recipes, including mirror glazes. When dissolved in water and then combined with other ingredients like sugar, cocoa, and cream, gelatin helps form a smooth, glossy finish that enhances both the appearance and flavor of the dessert.
Key aspects of gelatin’s role in mirror glaze include its ability to create a stable emulsion that prevents separation of ingredients, its gelling properties that help to achieve the desired thickness, and its ability to enhance the reflective quality of the glaze. The right amount of gelatin is essential; too little may result in a glaze that is too thin and runny, while too much can lead to a thick, unappealing texture.
The importance of gelatin in mirror glaze is evident in its impact on dessert presentation. A well-executed mirror glaze can elevate the visual appeal of cakes and pastries, making them more enticing to consumers. In commercial baking, where aesthetics can significantly influence sales, a perfect mirror glaze can be a key selling point. According to a survey by the National Restaurant Association, 83% of consumers consider the appearance of food to be a significant factor in their dining choices.
The benefits of using gelatin in mirror glazes extend beyond aesthetics; it also enhances the flavor experience by providing a smooth mouthfeel that complements the underlying dessert. Furthermore, gelatin-based glazes can be more stable at room temperature than those made with other thickening agents, reducing the risk of melting or losing their shine during display or serving.
Best practices for using gelatin in creating a mirror glaze involve properly blooming the gelatin in cold water before incorporating it into the warm mixture, ensuring that it dissolves completely. Additionally, allowing the glaze to cool to the right temperature before pouring it over the dessert is crucial for achieving that perfect, glossy finish. Understanding the science behind gelatin’s properties and how to manipulate them can lead to the creation of the best mirror glaze, enhancing both the professional and home baker’s repertoire.
What Techniques Should Be Employed to Ensure a High-Quality Mirror Glaze?
To achieve the best mirror glaze, several techniques must be employed to ensure a smooth and reflective finish.
- Proper Temperature Control: Maintaining the right temperature for your glaze mixture is crucial. Typically, the glaze should be heated to around 90-95°F (32-35°C) to ensure it flows smoothly and adheres well to the cake surface.
- Using High-Quality Ingredients: The quality of your ingredients directly impacts the final appearance of the mirror glaze. Using pure gelatin, quality chocolate, and fresh cream helps create a glossy finish that is both appealing and stable.
- Straining the Glaze: Straining the glaze before pouring it over the cake helps eliminate any lumps or air bubbles. This step is essential for achieving a flawless and shiny surface, as any imperfections will be magnified once the glaze sets.
- Proper Cake Preparation: The cake must be chilled and have a smooth, crumb coat before applying the mirror glaze. This helps prevent the glaze from sliding off and ensures that the final product has a perfect finish.
- Pouring Technique: Pouring the glaze from a height can help create an even layer as it cascades down the sides of the cake. This technique allows for better coverage and minimizes drips and uneven spots.
- Timing of Application: Timing is essential when applying the mirror glaze. It should be poured onto the cake while it is still warm to ensure proper adhesion and a seamless finish. If the glaze cools too much, it can become thick and difficult to work with.
- Finishing Touches: After applying the mirror glaze, it’s important to let it set properly before decorating further. Be gentle with any additional decorations to avoid disturbing the glaze, ensuring that the shiny finish remains intact.
How Can You Achieve a Smooth and Shiny Finish?
To achieve a smooth and shiny finish, several methods and materials can be utilized:
- Quality Mirror Glaze: Utilizing a high-quality mirror glaze is essential for achieving that reflective finish. These glazes are designed to fill in imperfections and create a sleek surface that reflects light beautifully.
- Proper Surface Preparation: Preparing the surface before applying glaze is crucial. This involves sanding and cleaning the surface thoroughly to remove any bumps, dust, or scratches, ensuring that the glaze adheres properly and results in a flawless finish.
- Application Technique: The method of applying the glaze can significantly impact the final appearance. Using a foam applicator or a high-density roller can help distribute the glaze evenly, while applying thin layers and allowing adequate drying time between coats will enhance the smoothness.
- Polishing: After the glaze has cured, polishing the surface can elevate its shine to a mirror-like finish. Using a polishing compound with a soft cloth or a machine polisher can help achieve a high luster by removing any minor imperfections left on the surface.
- Sealing: Finally, sealing the glaze with a clear coat can protect the finish and enhance its shine. A high-quality sealant can provide a durable, glossy layer that not only preserves the mirror effect but also adds resistance against scratches and environmental damage.
What Common Mistakes Should You Avoid When Making Mirror Glaze?
When making the best mirror glaze, avoiding common mistakes is crucial for achieving a perfect finish.
- Incorrect Temperature: Using ingredients at the wrong temperature can lead to a glaze that doesn’t set properly. The gelatin and sugar need to be heated to specific degrees to ensure the glaze is smooth and glossy; too hot can cause it to lose its shine, while too cool can result in a thick consistency that won’t flow well over the cake.
- Not Straining the Mixture: Failing to strain the glaze mixture can leave lumps and air bubbles, ruining the sleek appearance of the mirror glaze. Straining through a fine sieve removes any impurities and ensures a silky texture, which is essential for achieving that high-gloss finish.
- Overmixing: Overmixing the glaze can introduce unwanted air bubbles, which will mar the reflective surface. It’s important to mix just until combined, avoiding vigorous stirring that can create a foamy texture.
- Incorrect Proportions: Using the wrong ratios of ingredients can lead to a glaze that is either too runny or too thick. Following a reliable recipe with precise measurements is key to achieving the right consistency and flavor balance.
- Not Allowing the Cake to Cool: Pouring the glaze over a warm cake can cause it to melt or slide off, ruining the intended effect. It’s important to let the cake cool completely and ideally chill it in the refrigerator before applying the glaze for a perfect, glossy finish.
- Skipping the Trial Run: Attempting to create the glaze for the first time without a test run can lead to unexpected issues during the actual decoration. Conducting a trial run not only helps in perfecting the technique but also allows for adjustments in flavors and colors without the pressure of presentation.
What Tips Can Help Elevate Your Mirror Glaze to the Next Level?
To achieve the best mirror glaze, consider the following tips:
- Proper Temperature: Ensure your glaze is at the correct temperature before pouring, typically around 90°F (32°C). This temperature allows for a smooth flow and ensures even coverage without clumping or separating.
- Quality Ingredients: Use high-quality chocolate and gelatin to create a stable and glossy finish. The choice of ingredients can greatly affect the taste and texture, so opt for premium products that melt well and set beautifully.
- Straining the Glaze: Always strain your glaze through a fine mesh sieve before use. This step removes any air bubbles or imperfections, resulting in a silky, flawless finish that enhances the overall appearance of your dessert.
- Prepped Cake Surface: Ensure your cake is perfectly smooth and chilled before applying the glaze. A well-prepped surface helps the glaze adhere better and reduces the risk of it dripping or pooling unevenly.
- Pouring Technique: Pour the glaze from the center of the cake outward, allowing it to naturally flow down the sides. This technique ensures an even coating and minimizes the chances of air pockets forming as the glaze cascades over the edges.
- Timing of Application: Apply the glaze while it is still warm, as this helps it to flow and set correctly. Waiting too long can cause the glaze to thicken, leading to a less desirable finish.
- Add Color with Care: If you wish to add color to your mirror glaze, use gel food coloring for the best results. Liquid colors can alter the consistency, while gel dyes maintain the texture and shine of the glaze.