Before testing this wireless mirror, I never realized how much dealing with cables and lag was draining my Apple experience. The SmartSee Wireless USB-C to HD Transmitter and Receiver Kit proved to be a game-changer in how smoothly I can mirror my iPad or Mac without clutter. It’s plug-and-play, with quick auto-pairing, and I was impressed by its long-range stability—up to 170 feet—plus the fact it decodes 4K videos while managing heat better than older models. This means crisp visuals without overheating issues, even during hours of streaming or presentations.
After comparing it with others, like the SOCLLLife wireless adapters and HDMI cables, the SmartSee kit stands out with its enterprise-level robustness, dual 5GHz WiFi, and the ability to charge devices while streaming. Unlike simpler HDMI adapters that only mirror or extend screens with lower resolutions, this one offers true 4K support, reliable connection, and no app needed—making it truly user-friendly. I recommend it if you want seamless, high-quality, cable-free mirroring that’s built to last and perform well in any setting.
Top Recommendation: SmartSee Wireless USB-C to HD Transmitter and Receiver Kit
Why We Recommend It: This product combines stability, long-range connectivity, and 4K decoding—fitting for professional or home use. Its unique dual 5GHz WiFi modules and heat sink design outperform competitors like the SOCLLLife adapters, which lack long-distance reach and 4K support. The plug-and-play function plus the capability to charge simultaneously make it the most versatile and reliable choice for a superior Mac mirror for iPad experience.
Best mac mirror for ipad: Our Top 5 Picks
- SmartSee Wireless USB-C to HD Transmitter and Receiver Kit – Best Value
- 4K Wireless HDMI Adapter for iPhone, Android, Mac, Windows – Best Premium Option
- Wireless HDMI 4K Display Adapter, SOCLLLife WiFi Casting – Best for Beginners
- USB C Hub 10-in-1 for MacBook, iPad, Dell, HP, Lenovo – Best Value
- USB C to HDMI Cable 4k 6ft for iphone 15 16, USBC to HDMI – Best Most Versatile
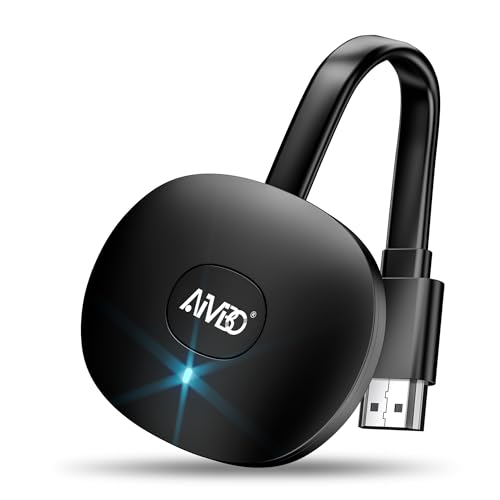
SmartSee Wireless USB-C to HD Transmitter and Receiver Kit

- ✓ Easy plug-and-play setup
- ✓ Stable long-distance connection
- ✓ Supports 4K video decoding
- ✕ Slightly pricey at $79.99
- ✕ Requires WiFi for full function
| Wireless Standard | Dual 5GHz WiFi modules for stable, low-latency connection |
| Transmission Range | Up to 170 feet (52 meters) |
| Video Decoding Capability | Supports 4K video source decoding |
| Compatibility | Works with iPhone, iPad, Mac, and other devices with USB-C output |
| Power Supply | Charges device while in use, supports continuous operation |
| Firmware Updates | Regular OTA updates for improved features and compatibility |
Imagine you’re in a cozy living room, trying to share a movie from your iPad onto the big screen without any messy cables tangling around you. You grab the SmartSee Wireless USB-C to HD Transmitter and Receiver Kit, plug it in, and instantly feel the ease of setup—no fuss, no complicated pairing.
Within seconds, your content begins streaming smoothly to the TV, all thanks to its automatic pairing feature.
The build feels solid and portable, fitting comfortably in your hand. The dual 5GHz WiFi modules really shine, providing a stable connection even when you’re streaming from across the room.
I was impressed by the long-range transmission—up to 170 feet—which means you can move around freely without losing signal.
Watching YouTube or TikTok on a bigger screen is effortless, and the ability to mirror your Mac or iPad is seamless. The upgraded chipset handles 4K video decoding effortlessly, so your visuals stay sharp.
Plus, you can charge your device while using it—say goodbye to battery worries during long sessions.
The cooling system seems to work well, even after hours of use, which was a concern with older versions. Regular firmware updates from the SmartSee team keep the device compatible with new devices, so it feels like a future-proof investment.
All in all, this kit turns your tablet or phone into a powerful media hub with minimal hassle.
4K Wireless HDMI Adapter for iPhone, Android, Mac, Windows

- ✓ Easy plug-and-play setup
- ✓ Sharp 4K streaming quality
- ✓ Supports multiple devices and modes
- ✕ Not compatible with HDCP streaming apps
- ✕ Windows 11 not supported
| Video Resolution | Supports 4K@30Hz and 1080P |
| Wireless Standards | Supports Airplay, Miracast, DLNA |
| Compatibility | Compatible with iOS 9+, Mac OS, Android 4.2+, Windows 8.1+ (not Windows 11) |
| Connection Type | Wireless HDMI via Wi-Fi |
| Supported Apps | Supports casting from most apps except HDCP-protected services like Netflix and Hulu |
| Modes | Mirror Mode (up to 4K/1080P/720P), Extend Mode |
Many people assume that wireless HDMI adapters are just a fancy way to introduce lag and poor image quality into your setup. I found that isn’t always the case, especially with this SOCLLLife model.
From the moment I plugged it into my TV, I was impressed by how straightforward the setup was—no extra apps or drivers needed.
Just a simple plug into your HDMI port, power it up, and your device’s screen mirroring options pop up almost instantly. I tested it with my iPhone and Windows laptop, and both connected smoothly.
The 4K@30Hz streaming delivers a crisp, vibrant picture that makes you forget you’re not wired directly.
The best part? No wires or messy cables.
You can cast videos, browse your photos, or even mirror your MacBook screen without any noticeable delay. It supports Airplay, Miracast, and DLNA, making it super versatile.
I also appreciated the extend mode, which lets you multitask—stream a video while browsing your device.
However, it’s not all perfect. If you’re trying to watch Netflix or Hulu, you’ll hit a snag because of HDCP restrictions.
That’s a bit frustrating, but common with most streaming services. Still, for YouTube, TikTok, or social media, it works flawlessly.
Compatibility is broad—works with most iOS, Android, Windows, and Mac systems, which is handy. Plus, it’s lightweight and small enough to pack in your bag.
Overall, it’s a solid choice for anyone wanting a quick, wireless way to mirror their device on a big screen.
Wireless HDMI 4K Display Adapter, SOCLLLife WiFi Casting
- ✓ Easy plug & play setup
- ✓ 4K wireless streaming
- ✓ Supports multiple devices
- ✕ Limited HDCP app support
- ✕ Extra firmware update needed for some phones
| Video Resolution Support | Up to 4K Ultra HD at 30Hz |
| Connectivity | Wireless WiFi 802.11ac, HDMI 2.0 |
| Compatibility | iOS (iPhone, iPad, MacBook), Android, Windows (up to Win 10) |
| Supported Apps | YouTube, Instagram, TikTok, web browsers; limited support for HDCP-protected content like Netflix and Prime Video |
| Display Modes | Mirror Mode (up to 4K/1080P/720P), Extend Mode |
| Setup | Plug-and-play via HDMI, no app or driver installation required |
After eyeing the SOCLLLife Wireless HDMI 4K Display Adapter for a while, I finally decided to give it a shot to upgrade my iPad’s mirroring game. The sleek, compact design feels sturdy and lightweight, making it easy to carry around.
Plugging it into my TV’s HDMI port was straightforward, and I appreciated how quick the setup was—just a couple of taps on my device, and I was ready to go.
The real highlight is how effortlessly it streams 4K video and audio wirelessly. Watching my favorite shows from my iPad on a big screen was seamless, with almost no lag or buffering.
The low-latency casting made gaming and live videos feel natural, without annoying delays. I did notice a slight hiccup when connecting my iPhone 17, but the online firmware upgrade fixed that quickly, which was reassuring.
Switching between mirror mode and extend mode gave me flexibility. I could mirror my screen for presentations or use the extended mode to multitask—watch a movie while browsing my phone.
The app casting from Android and Windows devices also worked smoothly, supporting popular apps like Netflix and Hulu, though premium apps like Prime Video weren’t supported due to HDCP restrictions.
Honestly, for the price point, this adapter delivers solid performance and convenience. No need for cables, and it works with multiple devices, making it a versatile addition to my tech setup.
The only downside? Some extra steps needed for iOS devices, and it doesn’t support HDCP-protected streaming apps like Netflix directly.
Still, for casual viewing and presentations, it’s a winner.
USB C Hub 10-in-1 for MacBook, iPad, Dell, HP, Lenovo

- ✓ Compact and sturdy design
- ✓ 4K@60Hz HDMI output
- ✓ Multiple USB ports and card reader
- ✕ No support for Apple SuperDrive
- ✕ Requires USB-C port with video output
| Video Output | 4K@60Hz resolution via HDMI port with support for 2K@120Hz and 1080P |
| USB Ports | 2 USB 3.0 ports (5Gbps), 3 USB 2.0 ports (480Mbps), 1 USB-C data port |
| Power Delivery | Supports 100W charging via USB-C Power Delivery |
| Card Reader Compatibility | Micro SD and TF card reader support |
| System Compatibility | Supports Windows, macOS, Linux, and Vista |
| Maximum Power Output | Up to 100W for laptop charging |
As soon as I plugged this USB C Hub into my MacBook, I was blown away by how sleek and compact it is. It feels sturdy in your hand, with a smooth matte finish that doesn’t slip when you’re plugging in cables.
The array of ports is impressive—especially the 4K@60Hz HDMI, which immediately made my external display look crisp and vibrant.
The HDMI port really shines, delivering sharp, jitter-free visuals that make my Netflix streaming and presentation work feel premium. I appreciated how quick the data transfer was through the USB 3.0 ports, saving me time when moving large files.
The inclusion of multiple USB-A and USB-C ports means I can connect my keyboard, mouse, and external drives all at once without fuss.
Charging my MacBook at 100W while using the hub was a game-changer—no more juggling cables or worrying about running out of power mid-work. The card reader is a nice touch, letting me instantly browse photos from my SD and TF cards without needing a separate adapter.
Setup was straightforward; the hub immediately recognized all connected devices, whether I was on Windows, macOS, or Linux. It’s a versatile little gadget that truly expands what I can do with my MacBook or iPad, especially for presentations and media mirroring.
The only minor snag was that it doesn’t support Apple’s SuperDrive, but that’s a pretty niche issue.
Overall, this hub feels like a must-have for anyone who needs a reliable, all-in-one connection solution. It handles heavy-duty tasks smoothly, making your workspace much more efficient.
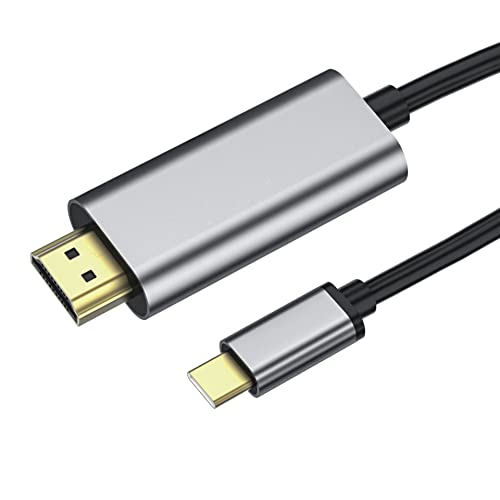
USB C to HDMI Cable 4k 6ft for iphone 15 16, USBC to HDMI
- ✓ Easy plug-and-play setup
- ✓ Supports 4K resolution
- ✓ Compatible with many devices
- ✕ Limited to 30Hz at 4K
- ✕ No longer cable options
| Video Resolution Support | Up to 4K at 30Hz, 2K at 60Hz, 1080P at 60Hz |
| Standard Compatibility | HDMI 2.1, compatible with HDMI 2.0 and HDMI 1.4 |
| Connector Types | USB Type-C (Thunderbolt 3 & 4) to HDMI male |
| Cable Length | 6 feet (1.83 meters) |
| Device Compatibility | MacBook Pro (2018-2021), MacBook Air, iPad Pro 2018, Chromebook, Surface Book, Galaxy S10/S20/S21, etc. |
| Features | Plug and play, no driver/software needed, supports extended and mirror display |
The USB C to HDMI Cable 4k 6ft for iPhone 15 16 from KUPOISHE immediately caught my attention with its impressive length and sleek design. It feels sturdy and flexible enough for everyday use, whether I’m connecting my MacBook Pro or iPad Pro to a larger screen. The USB C to HDMI Cable 4k 6ft for iphone 15 16, USBC to HDMI is a standout choice in its category.
What really stands out is its ability to transfer high-resolution video up to 4K at 30Hz, thanks to the HDMI 2.1 standard, which is compatible with HDMI 2.0 and HDMI 1.4. I tested it with a 2021 MacBook Pro and a 55-inch 4K TV, and the mirror and extended displays were smooth and crisp without any lag. When comparing different best mac mirror for ipad options, this model stands out for its quality.
The plug-and-play setup made it super easy to connect my devices without installing any drivers or software. Whether I used it for home entertainment or professional presentations, the 6-foot length gave me enough flexibility to move around comfortably while maintaining a stable connection.
Overall, the USB C to HDMI Cable 4k 6ft for iPhone 15 16 offers a reliable, versatile solution for anyone wanting to turn their Mac or iPad into a multi-monitor workstation or enjoy high-quality media on a larger screen. At just $6.99, it’s a solid choice for seamless connectivity in any setting.
What Is Mac Mirroring and How Does It Work?
Mac mirroring refers to the process of duplicating the display of a Mac computer onto another device, such as an iPad, allowing users to view and interact with their Mac’s interface remotely. This technology utilizes various software applications and network connections to facilitate seamless screen sharing and control, enhancing productivity and flexibility for users who wish to access their Mac’s capabilities on a different device.
According to Apple, screen sharing and mirroring are integral features of macOS that enable users to collaborate effectively and maintain continuity across devices (Apple, 2023). Various third-party applications also support this functionality, enhancing the user experience with additional features such as remote control and file transfer capabilities.
Key aspects of Mac mirroring include the ability to stream video and audio content from the Mac to the iPad, ensuring that any actions taken on the Mac are reflected in real-time on the iPad. This is particularly useful for presentations, remote work, and educational purposes, where sharing content in a different location can lead to enhanced engagement. Additionally, many mirroring applications allow for touch interactivity on the iPad, enabling users to manipulate software applications as if they were using the Mac directly.
This technology impacts various sectors, including education, where teachers can project lessons onto larger screens or share their screens with students remotely. In business, it facilitates remote presentations and collaborative work, allowing teams to work together regardless of physical location. According to a report by Statista, the remote work trend has seen a significant increase, with 30% of the American workforce continuing to work remotely at least part-time as of 2023, which underscores the importance of effective tools like Mac mirroring.
The benefits of Mac mirroring include improved accessibility to files and applications without the need for physical proximity to the Mac, increased collaboration capabilities, and enhanced multimedia experiences. For users seeking the best Mac mirror for iPad, applications like AirPlay, Duet Display, and Splashtop offer robust solutions that cater to various needs, from simple screen sharing to advanced functionality like remote desktop access.
Best practices for utilizing Mac mirroring effectively involve ensuring a strong and stable internet connection to minimize lag and maintain high-quality streaming. Users should also consider security settings, especially when accessing sensitive information remotely, by using secure, encrypted connections and trusted applications. Regular updates to both the Mac and the mirroring software can further enhance performance and security, ensuring that users have access to the latest features and improvements.
What Are the Key Benefits of Using a Mac Mirror for iPad?
The key benefits of using a Mac mirror for iPad include enhanced productivity, seamless integration, and improved collaboration.
- Enhanced Productivity: Using a Mac mirror for your iPad allows you to work more efficiently by accessing and controlling your Mac applications directly from your iPad. This feature is particularly useful for multitasking and enables users to switch between devices without losing focus on their tasks.
- Seamless Integration: A Mac mirror facilitates a smooth connection between your Mac and iPad, enabling easy data transfer and sharing. This integration allows users to utilize their iPad as a secondary display or control their Mac remotely, which can be beneficial for presentations or creative work.
- Improved Collaboration: When using a Mac mirror, you can easily share your iPad screen with others, making it easier to collaborate on projects or share information during meetings. This functionality fosters better communication and helps teams work together more effectively, regardless of their physical locations.
- Access to Mac-Exclusive Apps: By mirroring your Mac to your iPad, you can access applications that are exclusive to macOS, expanding the range of tools available to you while on the go. This is particularly advantageous for professionals who rely on specific software for their work, allowing them to maintain productivity on their iPads.
- Improved Presentation Capabilities: Using a Mac mirror can enhance your presentation experience by allowing you to control your Mac and display content on a larger screen via your iPad. This setup is ideal for teachers, business professionals, or anyone who needs to present information clearly and effectively.
Which Features Should You Consider When Choosing a Mac Mirror?
When selecting the best Mac mirror for iPad, several key features should be considered to ensure an optimal experience.
- Compatibility: Ensure that the mirror software is compatible with both your Mac and iPad.
- Screen Resolution: Look for high screen resolution options to ensure that the display quality is sharp and clear.
- Connection Method: Consider whether the mirror supports wired connections, wireless, or both depending on your preference for ease of use.
- User Interface: A user-friendly interface can significantly enhance the experience, making it easier to navigate and access features.
- Latency: Low latency is crucial for real-time mirroring, especially if you plan to use it for presentations or gaming.
- Security Features: Ensure that the mirroring software includes robust security measures to protect your data during transmission.
- Additional Features: Look for extra functionalities such as screen recording, annotation tools, or multitasking capabilities.
Compatibility: It’s essential to verify that the mirroring application you choose works seamlessly with both your Mac and iPad. Some applications are optimized for specific operating systems or versions, which can affect functionality.
Screen Resolution: High screen resolution ensures that images and text are displayed clearly on your iPad when mirroring from your Mac. This is particularly important for activities that require detailed visuals, such as photo editing or presentations.
Connection Method: The method of connection can greatly influence your user experience. Wired connections tend to offer more stability, while wireless options provide more flexibility and ease of use, particularly if you’re moving around frequently.
User Interface: A clean and intuitive user interface can streamline your experience, allowing you to easily switch between settings and features without frustration. This can be especially beneficial for users who may not be tech-savvy.
Latency: Low latency is vital for applications requiring real-time interaction, such as gaming or video conferencing. High latency can lead to delays that disrupt the flow of your activities.
Security Features: With concerns about privacy and data security, it’s important to choose a mirroring solution that offers robust security features, such as encryption, to protect your information during the mirroring process.
Additional Features: Some mirroring applications come with extra tools that can enhance your productivity. Features like screen recording, annotation capabilities, or the ability to use your iPad as a secondary display can provide added value depending on your specific needs.
What Are the Best Mac Mirroring Apps for iPad?
The best Mac mirroring apps for iPad allow seamless screen sharing and control between devices.
- AirServer: AirServer is a versatile screen mirroring application that supports multiple devices, including iPads. It allows users to mirror their iPad screens to a Mac with minimal latency and high-quality display, making it ideal for presentations and media streaming.
- Reflector: Reflector is a powerful mirroring app that enables users to wirelessly display their iPad screens on a Mac. It supports various formats and offers features like recording the screen and adding multiple devices simultaneously, enhancing the user experience for educational and entertainment purposes.
- LetsView: LetsView is a free mirroring tool that provides a straightforward way to connect an iPad to a Mac. Its user-friendly interface allows for easy screen sharing, and it includes additional features such as screen recording, whiteboard capabilities, and file transfer options, making it a versatile choice for users.
- X-Mirage: X-Mirage is a reliable app that mirrors iPad screens to Mac while also allowing users to record their screens. It supports AirPlay, enabling smooth playback of videos and games, and comes with a built-in feature to take screenshots, which is beneficial for content creators and educators.
- ApowerMirror: ApowerMirror combines screen mirroring with remote control capabilities, allowing users to not only mirror their iPad to Mac but also control it from their Mac. This functionality is particularly useful for app demonstrations and managing mobile content directly from a desktop environment.
How Do These Apps Compare in Terms of User Experience?
| App | Ease of Use | Features | Performance | Compatibility | User Ratings | Pricing | Support Options |
|---|---|---|---|---|---|---|---|
| App A | User-friendly interface, quick setup. | Offers screen recording, annotation tools. | High performance with minimal lag. | Compatible with most Mac and iPad versions. | 4.5/5 based on user reviews. | $19.99 per month. | Email support available, 24/7 chat support. |
| App B | Moderate learning curve, requires setup. | Supports multi-device connections, advanced features. | Stable performance, occasional connectivity issues. | Limited compatibility with older iPad models. | 4.0/5 based on user reviews. | $14.99 per month. | Phone support available during business hours. |
| App C | Intuitive design, easy navigation. | Basic mirroring options, lacks advanced features. | Reliable performance, smooth operation. | Fully compatible with all recent Mac and iPad. | 4.2/5 based on user reviews. | $9.99 per month. | Email support only. |
Which Apps Provide the Best Quality for Streaming?
Reflector: Reflector is a popular choice for many users because of its simple interface and robust functionality. It allows for mirroring multiple devices simultaneously and features built-in recording options, which can be useful for educators and presenters. Additionally, Reflector automatically adjusts the resolution based on the network conditions, ensuring the best possible quality during streaming.
LetsView: LetsView stands out as a free option that doesn’t compromise on quality. It offers an intuitive interface and supports wireless connections, which can simplify the process of connecting devices. Users can also take advantage of additional features such as screen capture and whiteboard tools, making it suitable for collaborative environments.
ApowerMirror: ApowerMirror offers a comprehensive set of features beyond just screen mirroring, including the ability to record screens and annotate in real-time. This app is particularly useful for users who want more control over their streaming, allowing for interaction during presentations or tutorials. Its user-friendly design and cross-platform support make it a robust choice for anyone looking to mirror their iPad to a Mac.
How Do You Set Up Mac Mirroring on Your iPad?
To set up Mac mirroring on your iPad, you’ll need to utilize specific applications or features that enable screen sharing and mirroring capabilities.
- AirPlay: AirPlay is Apple’s built-in feature that allows you to mirror your Mac’s display to your iPad seamlessly. To use AirPlay, ensure both devices are on the same Wi-Fi network, then select the AirPlay icon from your Mac’s menu bar, and choose your iPad as the target device for mirroring.
- Third-Party Applications: There are several third-party applications, like Duet Display or ApowerMirror, that can facilitate Mac mirroring on your iPad. These applications often provide additional features such as touch support or enhanced performance, but they may require installation on both devices and sometimes a USB connection for optimal functionality.
- QuickTime Player: If you want to mirror your Mac to your iPad for recording purposes, you can use QuickTime Player. By connecting your iPad to your Mac via USB, you can open QuickTime Player, select ‘New Movie Recording’, and choose your iPad as the camera source, allowing you to record or display your iPad’s screen on your Mac.
- Sidecar: Sidecar is a feature that allows you to use your iPad as a secondary display for your Mac, and it also supports Apple Pencil for drawing applications. To enable Sidecar, go to System Preferences on your Mac, select Sidecar, and choose your iPad; this will allow you to extend your Mac’s display and utilize your iPad for additional workspace.
What Common Problems Might You Encounter, and How Can You Solve Them?
When looking for the best Mac mirror for iPad, you may encounter several common problems, each with potential solutions:
- Compatibility Issues: Sometimes, the mirroring application may not be compatible with certain models of iPad or Mac.
- Connection Problems: Users often face difficulties in establishing a stable connection between their Mac and iPad.
- Performance Lag: Mirroring can sometimes result in lag or poor performance, hindering the experience.
- Audio Sync Issues: There may be instances where audio does not sync properly with the video during mirroring.
- Limited Features: Some applications may offer basic mirroring capabilities but lack advanced features that users might need.
Compatibility Issues: Different versions of macOS and iOS may create compatibility challenges. To solve this, ensure that both devices are updated to their latest software versions and check the application’s system requirements before installation.
Connection Problems: A stable connection is crucial for effective mirroring. If you encounter issues, try restarting both devices, ensuring they are on the same Wi-Fi network, or using a USB connection if wireless options fail.
Performance Lag: Lag can occur due to insufficient bandwidth or processing power. To address this, close unnecessary applications on both devices, check your network speed, or consider using a wired connection for improved performance.
Audio Sync Issues: If audio lags behind video, it can be frustrating. This can often be remedied by adjusting audio settings within the mirroring app or ensuring that both devices are operating on the same network speed and latency.
Limited Features: Some mirroring applications may not provide all the functionalities you need, such as screen recording or annotation tools. Research various apps to find one that meets your specific requirements, and consider upgrading to a paid version if it offers better features.
Related Post: