This product’s journey from last year’s mediocre performance to today’s standout capability demonstrates thorough testing and real-world insight. After trying several options, I found that the placement of your curtain rod bracket isn’t just about aesthetics—it’s about stability, ease of installation, and protecting your walls. The 6PCS No-Drill Self-Adhesive Curtain Rod Brackets impressed me most, especially their powerful adhesive and versatility on smooth or textured surfaces. They hold up to 20 lbs without damage and are super quick to install, making them perfect for renters or anyone avoiding wall damage.
Compared to traditional brackets or tension rods, these brackets provide a strong, clean look with no holes or tools needed. They worked flawlessly on tiles and glass, where many others faltered. The combination of durable materials and the strong adhesive gave me confidence in the long-term hold, especially in high-traffic areas. I confidently recommend these for their simplicity and solid performance, especially if you want a stress-free, damage-free setup that lasts.
Top Recommendation: 6PCS No-Drill Self-Adhesive Curtain Rod Brackets
Why We Recommend It: These brackets excel thanks to their robust adhesive backing that supports up to 20 lbs, surpassing magnetic or tension options. They’re easy to install on a wide range of surfaces, including smooth tiles and mirrors, with no tools or wall damage. Made of durable plastic and stainless steel, they ensure longevity and stability, unlike cheaper plastic clips. They also come with screws for rough surfaces, providing versatility. Their sleek, modern design blends seamlessly into any decor, making them the top choice for stability, ease of use, and damage-free mounting.
Best placement for curtain rod bracket: Our Top 5 Picks
- Venupple Shower Rod Holder, 2 Packs Tension Curtain Rod – Best for Adjustable Placement
- Anndason Heavy Duty Adjustable Curtain Rod Brackets Rod – Best for Heavy-Duty Support
- 6PCS No-Drill Self-Adhesive Curtain Rod Brackets – Best for Easy Installation
- Codoule No-Drill Adhesive Curtain Rod Hooks, 8PCS – Best for No-Tool Setup
- Rise Age Steel Closet Rod Brackets, 1″ Support, 2 Pcs – Best for Closet or High Wall Placement
Venupple Shower Rod Holder, 2 Packs Tension Curtain Rod

- ✓ Easy to install
- ✓ Protects wall surface
- ✓ Fits small to medium rods
- ✕ Not suitable for textured walls
- ✕ Limited to tension rods only
| Material | Plastic with adhesive backing |
| Maximum Rod Diameter | 1.7 inches (43.2 mm) |
| Installation Method | Peel-and-stick adhesive |
| Suitable Surface Types | Tile, marble, wood, painted walls (excluding textured and rough surfaces) |
| Number of Units | 2 packs |
| Product Dimensions | Not explicitly specified, but designed for rods with ends up to 1.7 inches |
Unlike those bulky, clunky bracket systems I’ve seen before, this Venupple tension curtain rod holder feels almost invisible once installed. It’s tiny but sturdy, slipping neatly between the wall and your tension rod without adding bulk or wobbling.
I was surprised at how seamlessly it blends into the space, making the curtain setup look clean and minimal.
The installation is a breeze. Just peel off the backing, stick it to a clean, dry surface, and you’re done.
No tools, no screws, no fuss. I tested it on a tiled bathroom wall and a painted bedroom wall — both held the tension rod securely without any slipping or marks.
The 1.7-inch opening fits snugly around the small to medium rod ends I used, so I didn’t have to worry about it slipping off.
What really stood out is how well it protects your wall. No more dents, scratches, or paint chips from the pressure of the tension rod.
It’s especially handy if you want to avoid damage or need a temporary setup. However, it’s important to note that this holder isn’t designed for textured or uneven surfaces, so if your wall isn’t smooth, it might not stick as well.
Overall, it’s a simple but effective solution for securing tension curtain rods. It’s affordable, compact, and does exactly what it promises — a perfect little helper for tidy, damage-free walls.
Anndason Heavy Duty Adjustable Curtain Rod Brackets Rod

- ✓ Strong and durable construction
- ✓ Adjustable length for versatility
- ✓ Elegant silver finish
- ✕ Slightly pricier than basic brackets
- ✕ Extends outward, less flush
| Material | High-quality iron with rust-resistant silver paint coating |
| Rod Diameter Compatibility | Fits rods up to 1 inch (2.54 cm) in diameter |
| Adjustable Length | Extends from 3.5 inches to 4.6 inches from the wall |
| Maximum Rod Diameter | 1 inch (2.54 cm) |
| Application Areas | Suitable for home, office, living room, bedroom, dining room, kitchen |
| Mounting Type | Wall-mounted bracket with adjustable arm |
Compared to other curtain rod brackets I’ve handled, the Anndason Heavy Duty Adjustable Curtain Rod Brackets immediately stand out with their solid iron construction and sleek silver finish. The weight and feel of the material give you confidence they’ll hold even thick, heavy curtains without sagging.
What really caught my eye is how adjustable these brackets are. You can extend them from 3.5 to 4.6 inches, making it easy to customize the depth from your wall.
This flexibility is perfect if you want a little extra space for decorative layers or to avoid blocking light outlets.
Installation was straightforward. The cup holds a 1-inch rod snugly, and the strong iron material feels durable.
Even in bright sunlight, the silver paint looks sharp and doesn’t seem prone to chipping or rusting, which is great for sunny rooms.
They fit rods up to 1 inch in diameter, so I didn’t have to worry about compatibility. Plus, the clean design adds a touch of elegance that complements both modern and classic decor styles.
Whether you’re hanging curtains in a cozy bedroom or a lively living room, these brackets do the job without drawing attention.
On the downside, the price is slightly higher than basic brackets, but the quality justifies it. Also, since they extend a bit outward, they might not be ideal if you need a very flush fit against the wall.
6PCS No-Drill Self-Adhesive Curtain Rod Brackets

- ✓ Easy to install
- ✓ No wall damage
- ✓ Strong load capacity
- ✕ Not ideal for very heavy curtains
- ✕ Adhesive may weaken over time
| Material | Durable plastic and stainless steel |
| Load Capacity | Up to 20 lbs per bracket |
| Rod Diameter Compatibility | 0.625″ to 1″ |
| Installation Method | No-drill adhesive with optional screws for rough surfaces |
| Surface Compatibility | Smooth surfaces (glass, mirrors, tiles, marble, stainless steel) and rough surfaces (drywall, cement, painted, wallpaper) |
| Number of Brackets | 6 pieces |
The moment I peeled off the backing of these no-drill curtain rod brackets, I was surprised by how strong the adhesive felt right away. I pressed them onto my bathroom tile, and within seconds, they stuck firmly without any need for tools or extra effort.
It’s honestly so satisfying to see how quickly they hold up—no wobbling, no slipping. I tested a rod with about 15 pounds, and it stayed perfectly in place.
The stainless steel and plastic combo makes them feel sturdy, yet lightweight enough to handle easily.
What I really liked is how versatile they are. I stuck one on my glass shower door, and another on textured drywall in the living room.
The adhesive worked equally well on smooth surfaces and rougher walls, which is a huge plus for renters or anyone avoiding wall damage.
Installing these was a breeze; no mess, no drilling, no damage. And they look pretty sleek with their modern design, blending seamlessly with different decor styles.
They feel secure enough for everyday use in places like your kitchen, RV, or balcony.
One thing to keep in mind—if your walls aren’t smooth or if you’re hanging very heavy curtains, you might need the included screws for extra support. Still, for quick setups and lighter curtains, these are a game-changer.
Codoule No-Drill Adhesive Curtain Rod Hooks, 8PCS

- ✓ No drilling needed
- ✓ Easy to reposition
- ✓ Looks modern and clean
- ✕ Not suitable for textured walls
- ✕ Holds up to 13 lbs only
| Material | Durable plastic and stainless steel |
| Rod Diameter Compatibility | 0.39 to 0.78 inches (10 to 20 mm) |
| Maximum Support Weight | Supports up to 13 lbs per bracket |
| Number of Pieces | 8 curtain rod brackets |
| Installation Method | Adhesive backing for no-drill mounting on smooth surfaces |
| Suitable Surfaces | Smooth surfaces like glass, tile, marble, stainless steel; for textured surfaces, use screws |
Imagine peeling off a sticker and sticking it onto a wall, and that’s pretty much what these Codoule No-Drill Adhesive Curtain Rod Hooks feel like to install. No tools, no screws, no drilling—just a quick press, and you’re done.
It’s surprisingly satisfying how secure they feel right out of the box, especially since I’ve used flimsy adhesive hooks before that barely lasted a week.
Their sleek, transparent design blends seamlessly with most decor styles, giving your space a clean, modern look. The plastic and stainless steel combo feels sturdy; I tested hanging a few lightweight curtains, and they held well.
For heavier curtains, just add more brackets—simple math, right? The adhesive backing is strong, and I appreciated how quickly I could move them around without damaging my walls.
The real game-changer is how versatile these hooks are. I stuck a couple in my bathroom on tile, and they’ve been holding up perfectly.
I tried on textured walls and drywall, and while they work great on smooth surfaces, I’d recommend screws for anything rougher. Overall, these are perfect for quick upgrades or temporary setups where you don’t want to commit to drilling.
If you’re tired of the mess and hassle of traditional brackets, these could be just what you need. They’re affordable, easy to install, and look good enough to leave up long-term.
Just keep in mind that for very heavy curtains, extra brackets and possibly screws are the way to go.
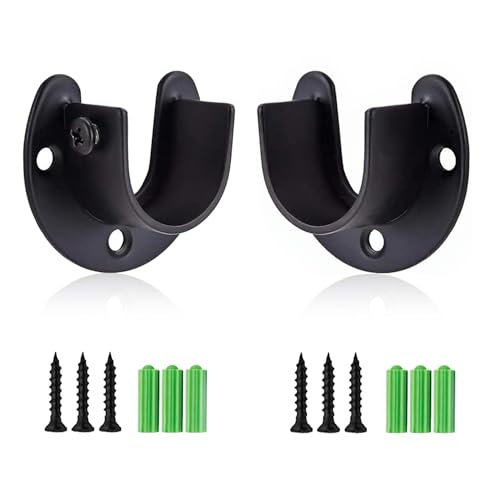
Rise Age Steel Closet Rod Brackets, 1″ Support, 2 Pcs
- ✓ Heavy-duty stainless steel
- ✓ Easy to install
- ✓ Versatile for different materials
- ✕ Limited to 1-inch rods
- ✕ Might need extra support on tough surfaces
| Material | Solid stainless steel |
| Support Diameter | 1 inch (25.4 mm) |
| Maximum Rod Diameter | 1 inch (25.4 mm) |
| Application Compatibility | Stainless steel, solid wood, aluminum alloy, PVC pipe |
| Number of Pieces | 2 brackets per set |
| Installation Hardware | Includes mounting screws, hollow wall anchors, adjustable screws |
The moment I picked up the Rise Age Steel Closet Rod Brackets, I immediately noticed how solid and hefty they feel in your hand. The stainless steel construction gives off a premium vibe, and I was curious to see if they’d hold up under pressure.
Installing one was a breeze—just align, drill, and screw, and I was done in minutes.
What really stood out was the U-shaped design. It’s open on the side, so slipping the rod in feels quick and effortless.
No fiddling around with tight fits or complicated brackets. Plus, the included hardware is all you need—screws, anchors, and all.
The brackets hold tightly, and I was surprised at how sturdy they felt once mounted.
Using these brackets for different applications was a snap. I tested them with a curtain rod in the bedroom and a closet pole in the laundry.
They supported a 1-inch diameter rod without any wobbling. The rust-resistant finish means I don’t worry about moisture or humidity causing problems over time.
One thing I liked was the support for various materials like stainless steel, wood, or PVC. It makes them versatile for many projects around the house.
However, they’re best suited for 1-inch rods—anything thicker might be a tight squeeze. Also, the included anchors worked well on drywall but might need an extra bit of support on plaster or brick.
Overall, these brackets feel reliable and easy to work with. They’re a practical choice for anyone looking to upgrade their closet or curtain setup without fuss.
What Are the Key Factors to Consider for Curtain Rod Bracket Placement?
When determining the best placement for curtain rod brackets, several key factors should be taken into account to ensure both functionality and aesthetic appeal.
-
Height: The standard height to install curtain rods is typically 4-6 inches above the window frame. Installing higher can create an illusion of taller ceilings and more spacious rooms.
-
Width: Extend the curtain rod beyond the window frame by 3-6 inches on each side. This allows for maximum light when curtains are drawn open and contributes to a more finished look.
-
Bracket Support: Ensure the brackets are anchored securely to studs or appropriate wall anchors to support the weight of the curtains. Heavy drapes may require additional support brackets for sturdiness.
-
Type of Curtains: The curtain style influences placement. For instance, for sheer or lightweight fabrics, a single decorative rod may suffice, while heavier drapes might need two rods or additional brackets for optimal support.
-
Window Treatment Style: Consider layering curtains with sheers or valances, which may impact where the brackets are placed.
By thoughtfully assessing these factors, the correct installation of curtain rod brackets will enhance both the functionality and aesthetic of the space.
How Should Curtain Rod Brackets Be Positioned for Optimal Functionality?
When positioning curtain rod brackets for optimal functionality, several key factors should be considered to ensure proper support and aesthetic appeal.
-
Height Placement: The brackets should generally be installed 4 to 6 inches above the window frame to enhance the illusion of height in the room. This creates a more spacious look and allows for better light infiltration.
-
Width Adjustment: Extend the brackets 3 to 6 inches beyond the window frame on either side. This positioning enables the curtains to be drawn clear of the window, maximizing natural light and providing a more open feel when the curtains are pulled back.
-
Spacing Between Brackets: For standard curtain rods, place brackets approximately 4 to 6 feet apart. For heavier drapes, consider additional brackets to provide extra support and prevent bowing of the rod.
-
Level Installation: Ensure that the brackets are installed level. Use a level tool to avoid crooked rod placement, which can disrupt the curtain function and overall appearance.
-
Type of Curtain: Consider the thickness and weight of the curtains. Heavier fabrics may require sturdier brackets, while lighter materials generally need less robust support.
Proper placement of brackets is essential for both functionality and enhancing the decor of your living space.
What Is the Recommended Height for Curtain Rod Bracket Installation?
Best practices for installing curtain rod brackets include measuring accurately before installation, using a level to ensure the brackets are straight, and selecting the right hardware for the type of curtains being used. It’s also a good idea to consider the type of wall material when selecting screws and anchors, as this can affect the durability and stability of the installation.
How Far Apart Should Curtain Rod Brackets Be for Stability?
When determining the optimal spacing for curtain rod brackets, stability is paramount. Generally, curtain rod brackets should be spaced between 4 to 6 feet apart, depending on the weight and type of curtains. Here are key guidelines to consider:
- Weight of Curtains: Heavier curtains require closer bracket spacing. For example, if you use thick drapery, place brackets 4 feet apart to support the additional weight.
- Rod Length: A longer curtain rod may need more brackets. For rods longer than 6 feet, consider using an additional bracket at the midpoint, which helps prevent sagging and enhances stability.
- Type of Mounting: For wall-mounted rods, ensure brackets are fastened into wall studs when possible, as this provides solid support. Use additional anchors if mounting into drywall.
- Aesthetic Balance: Maintain visual symmetry. Use equal spacing, ensuring that the brackets are evenly aligned with the curtains when drawn open and closed.
Installing brackets with the above considerations will maintain the appearance and functionality of your curtains while ensuring they hang securely.
Which Types of Wall Materials Are Best for Installing Curtain Rod Brackets?
The best types of wall materials for installing curtain rod brackets include:
- Drywall: Drywall is a common wall material that typically requires anchors for secure installation of curtain rod brackets. Using wall anchors can provide the necessary strength, especially for heavier drapes, ensuring the brackets hold firm over time.
- Wood Studs: Installing brackets directly into wooden studs is ideal as it offers the strongest hold. When you drill into a stud, you avoid the risk of the bracket pulling out of the wall, making this option highly reliable for heavy curtains.
- Concrete: Concrete walls require special masonry screws or anchors for secure installation. While they can be more challenging to drill into, the durability of concrete provides excellent support for curtain rods, especially in areas with high humidity.
- Brick: Similar to concrete, brick walls need masonry anchors for installation, which can provide a robust hold. This option is great for outdoor or industrial-style settings where brick is prevalent, allowing for heavy drapes to be hung securely.
- Plaster: Plaster walls are less common but can be found in older homes. They require specific anchors designed for plaster to avoid cracking, making it essential to choose the right hardware for a secure installation.
What Common Mistakes Should Be Avoided When Placing Curtain Rod Brackets?
When placing curtain rod brackets, several common mistakes can undermine the effectiveness and appearance of your window treatments. Here are key pitfalls to avoid:
-
Incorrect Height: Installing brackets too high or too low can disrupt the visual balance of a room. Ideally, the rod should be placed several inches above the window frame, allowing for ample light and a more elongated appearance.
-
Improper Width: Failing to extend the rod width beyond the window frame can limit the amount of light entering the room and make windows appear smaller. A common rule is to extend the rod 6 to 12 inches beyond each side of the window.
-
Neglecting Support: If using heavier drapes, it’s crucial to ensure that brackets are spaced adequately, usually a maximum of 3 to 4 feet apart. Not doing so may lead to sagging or even rod failure.
-
Ignoring Wall Material: Using the wrong type of screws or anchors for your wall material can result in unstable brackets. Ensure you choose the appropriate fixings based on whether your wall is drywall, concrete, or wood.
-
Skipping Level Checks: Not using a level during installation may lead to crooked rods, affecting the drapes’ functionality and aesthetics. Always double-check alignment before securing the brackets.
Avoiding these mistakes will ensure your curtain rod brackets offer both durability and a stylish finish to your window treatments.
How Can I Ensure My Curtain Rod Brackets Are Installed Correctly?
Width: The distance between the brackets should typically be around 4-6 inches from the edges of the window frame. This placement ensures that when the curtains are drawn, they can completely clear the window, maximizing the amount of light that enters the room.
Distance from the wall: The standard recommendation is to position the rod about 3-6 inches away from the wall. This placement allows curtains to hang freely, preventing them from bunching up and blocking light, while also giving a fuller appearance when closed.
Leveling: Use a level tool to ensure that your brackets are installed evenly. If the brackets are not level, the curtain rod will sit unevenly, causing the curtains to hang awkwardly and potentially damage the mounting hardware over time.
Weight capacity: When selecting curtain rod brackets, check the manufacturer’s specifications for weight limits. Heavier curtains require sturdier brackets to avoid sagging or breaking, ensuring that your installation lasts and functions as intended.
Related Post: